
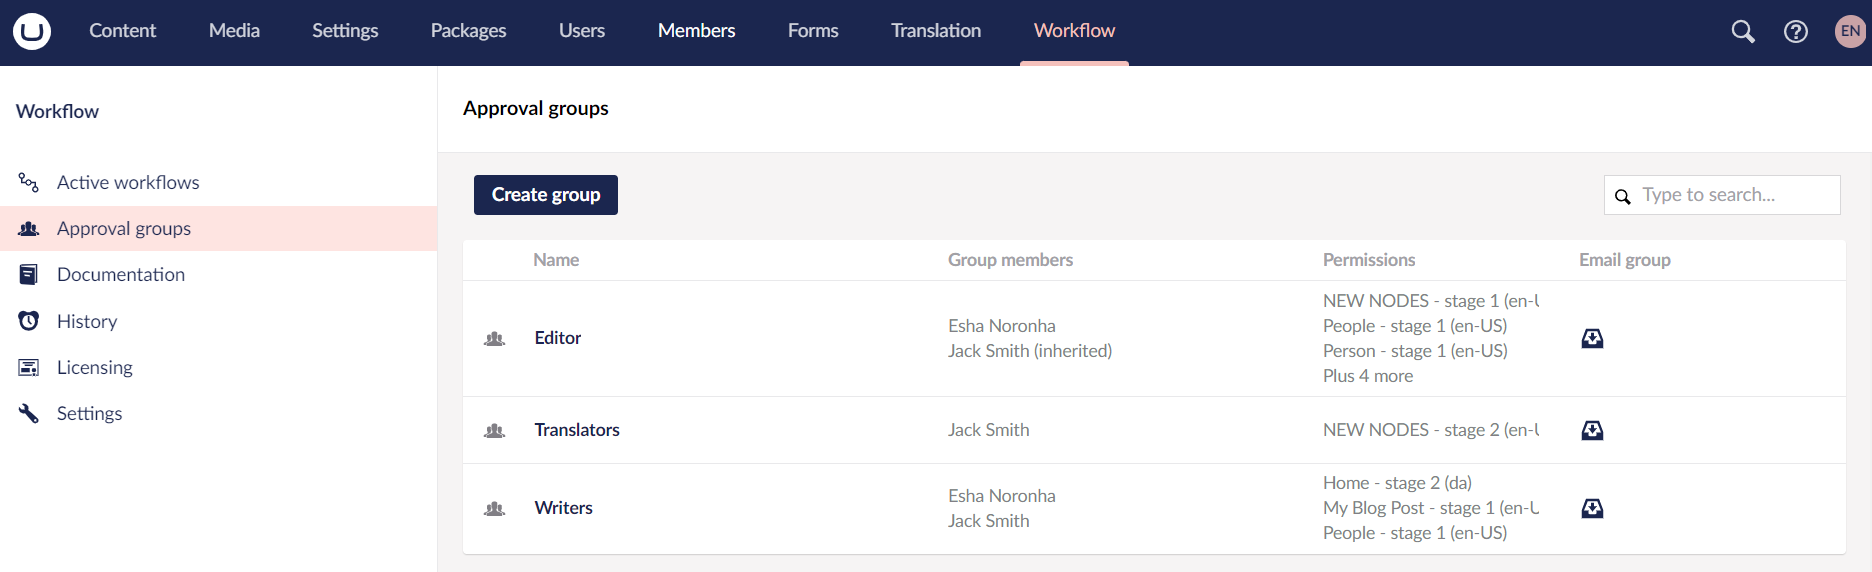
The Approval groups view in the Workflow section lists the active groups name, group members, their permissions, and a quick link to email the group.
- Go to the Workflow section.
- Click on Approval groups.
- Click Create Group.
- Enter a Name for the Approval Group. For example: Danish Editors.
- Enter a Description to remind you why the group exists.
- Enter the group's Email address in the Settings section to which the notifications will be sent.
- Select the Language from the drop-down list.
- Enable offline approval to allow users in this group to approve changes without logging in to the backoffice.
- Click Save Group.

*Create Approval Groups
You can create a total of 5 groups on unlicensed installations. The paid license removes this restriction.
You can search for a specific group using the Search bar. Select a group from the list to edit its Settings, Roles, Members, and view the group's History.
Approval Groups Settings
The Settings tab consists of the following fields:
- Group Email: Workflow notifications are sent to a generic inbox (a group's email address) rather than the individual group members.
- Language: Select a language variant for the email.
- Enable Offline approval: Allow the users of this group to approve changes without logging in to the Backoffice. For more information, see the Enable Offline approval section. This feature requires a paid license.

Roles
The Roles tab provides an overview of the current workflow roles for the Group:
- Node-based approvals: This workflow applies only to the specified node.
- Document-type approvals: This workflow applies to all the nodes of a given Document Type.
You can set these Roles in the Workflow Settings section.
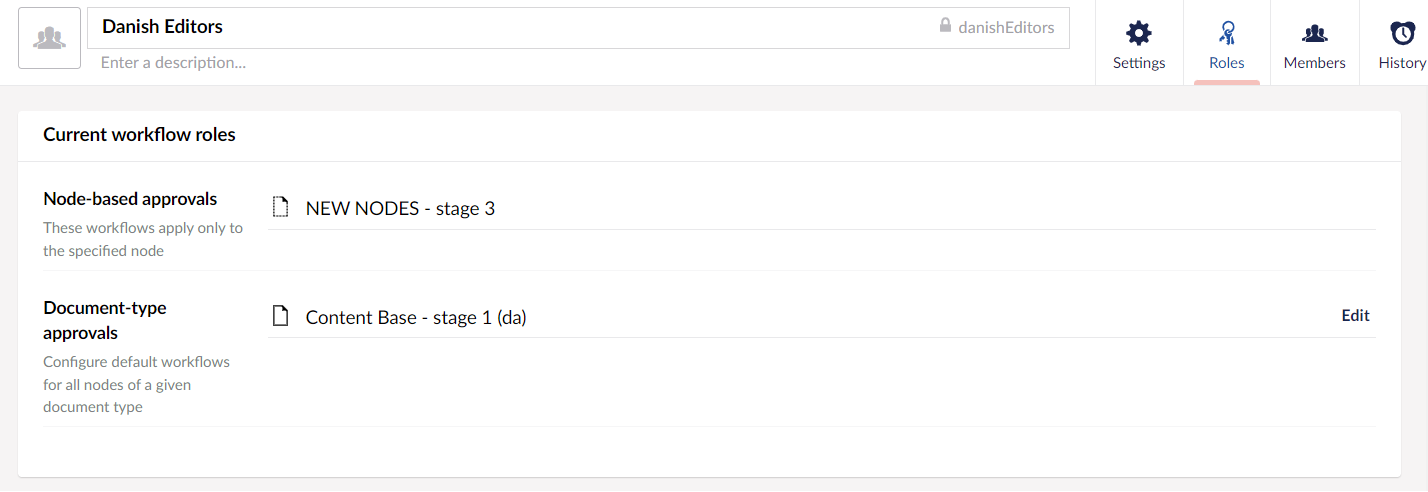
*Approval group Roles
The Members tab manages the membership for the given user group. Add members to approval groups to determine which member will be responsible for approving content changes. Group Members can be explicitly added to the group or can inherit group membership from an existing Umbraco group. Ideally, group members are set explicitly to ensure changes made to Umbraco groups do not cause unexpected changes to workflow permissions.
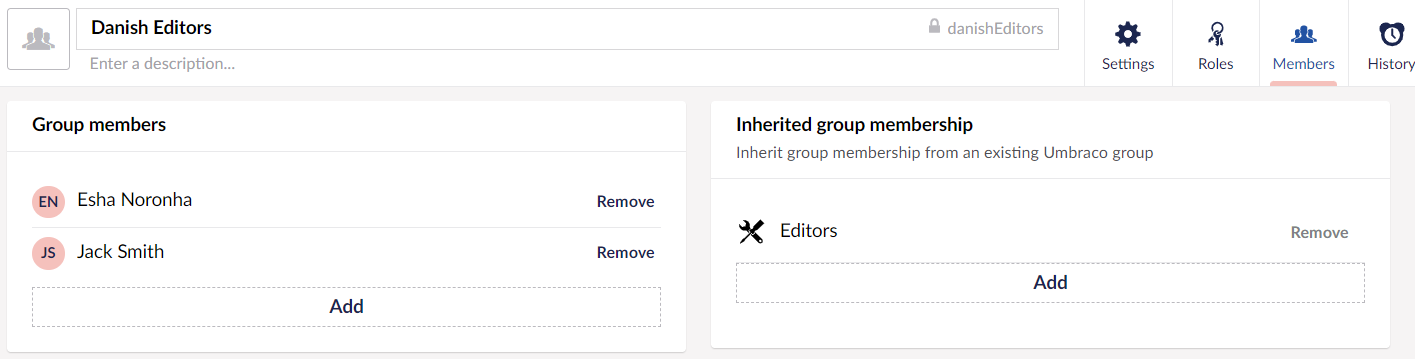
*Approval group Members
To add a Group member, follow these steps:
- Go to the Workflow section.
- Click on Approval groups.
- Select a group from the list to edit its Members.
- Go to the Members tab.
- Click Add in the Group members section.
- Select the Users you want to add to the approval group.
- Click Save Group.
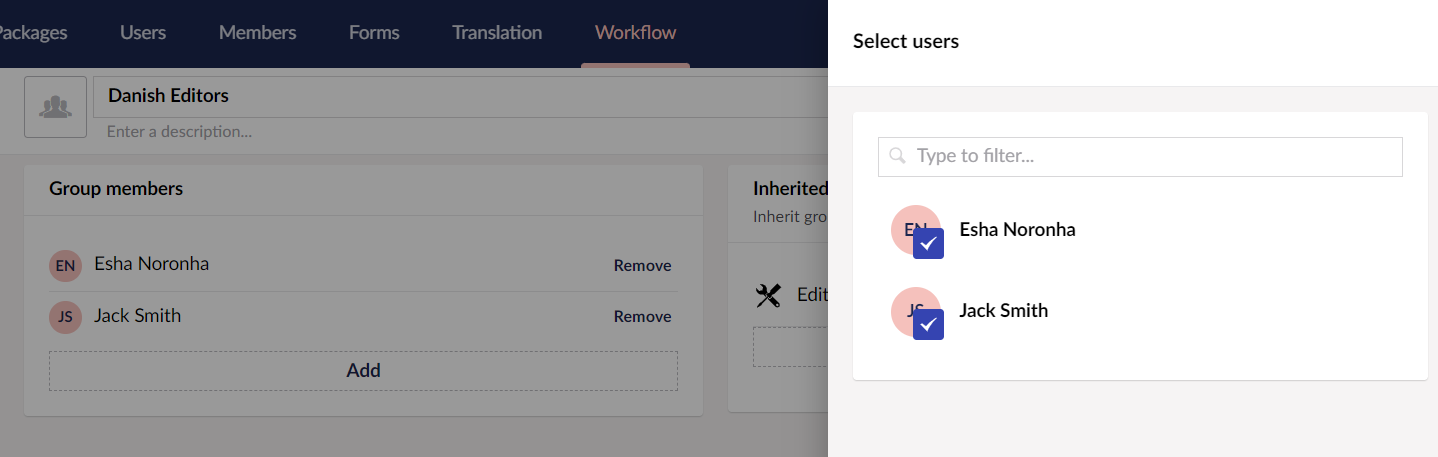
*Add group Members
To remove a Group member, click Remove.
To inherit an existing Umbraco group membership, follow these steps:
- Go to the Workflow section.
- Click on Approval groups.
- Select a group from the list to edit its Members.
- Go to the Members tab.
- Click Add in the Inherited group membership section.
- Select the User groups you want to add to the approval group.
-
Click Save Group.
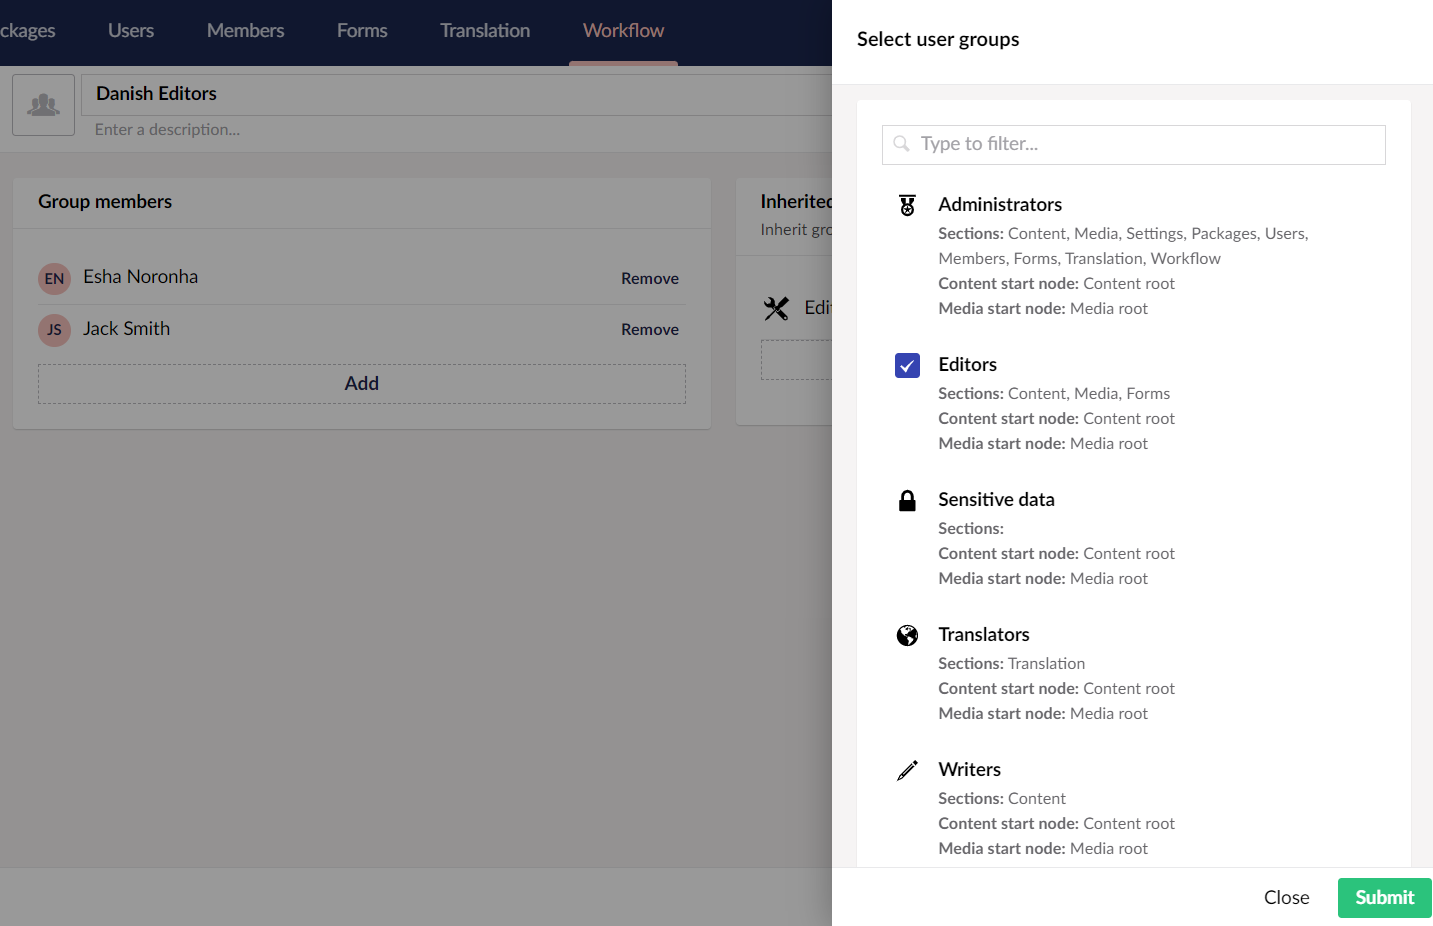
*Inherited group membership
To remove a Group membership, click Remove.
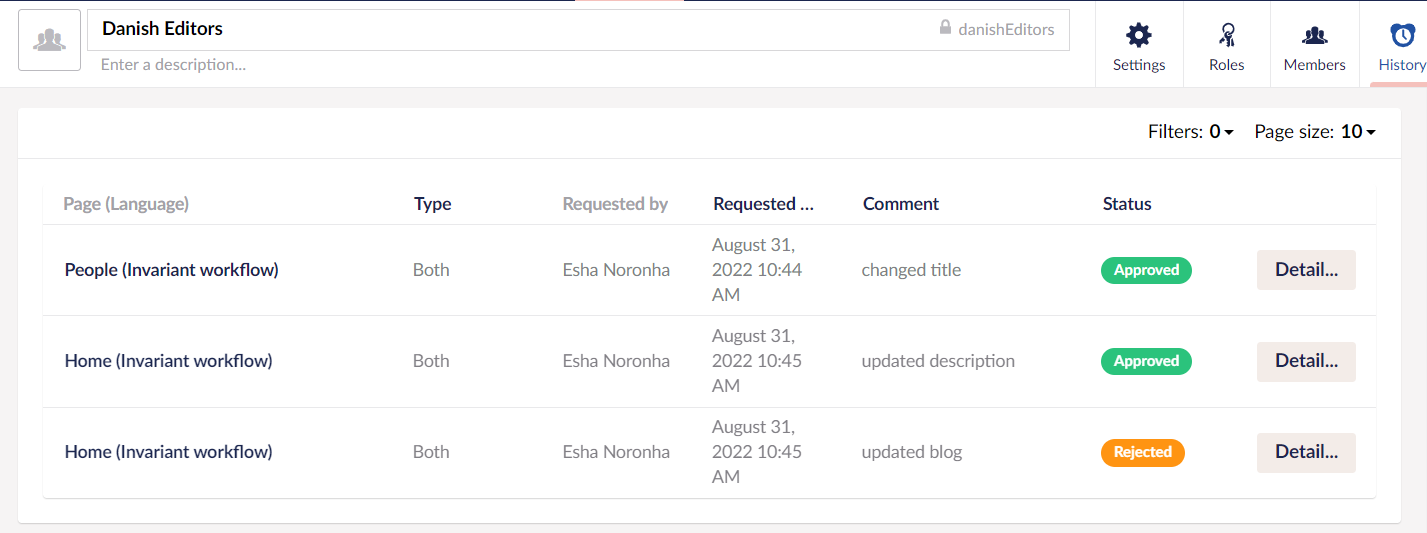
-
Type of workflow roles (Node-based approvals or Document type approvals)
-
Workflow requested by
-
Date the workflow was requested on
-
Comment describing the changes
-
Status of the workflow
*Approval group history
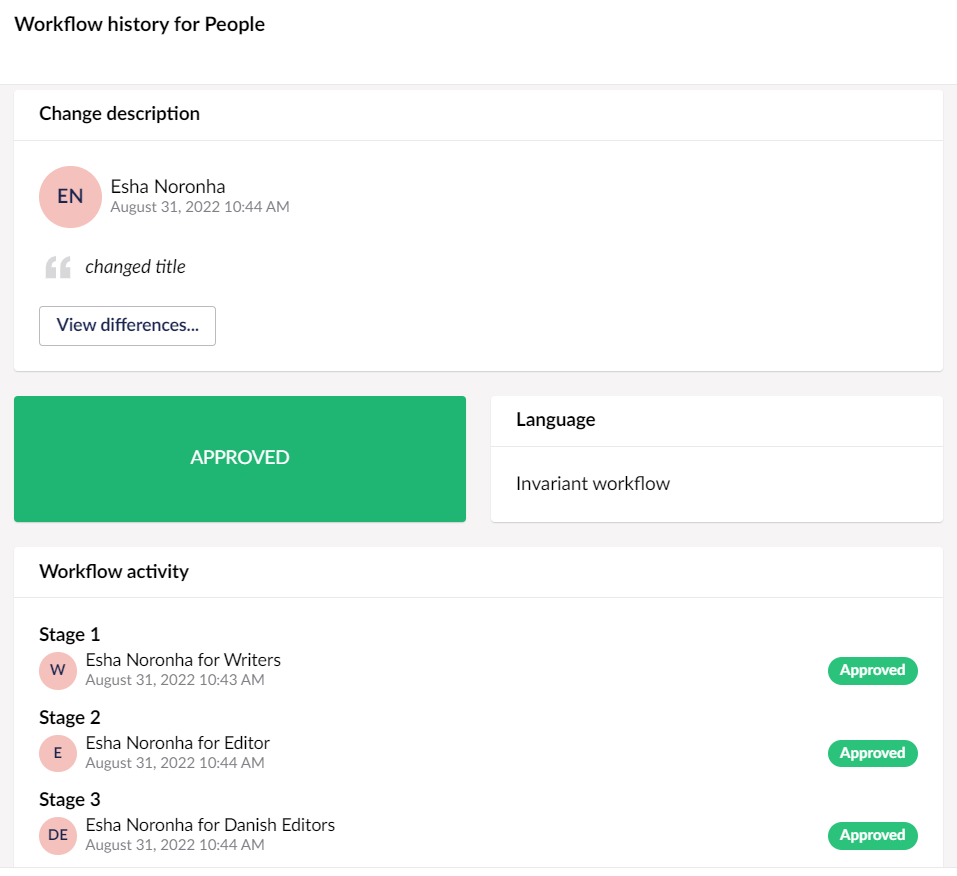
*Details overlay